I am breaking this 'little' project in to stages and so Stage 1 is PREPARATION! with all that fabric at stake there is no room for error! Thankfully the Tilda website has all the information here http://www.tildasworld.com/the-apple-bloom-quilt/ . I have printed off the instructions, then made myself a template of each size of each piece of the 'Log Cabin' pattern ready to start cutting the fabrics. If anyone wants to try this themselves I purchased 2 x Tilda Apple Bloom Fat Quarter Bundles and now having cut everything I can tell you this was the perfect amount but you will also need to buy 1/2 metre of the 'Yarn Green' fabric and a fat quarter of 'Yellow Tan Sun' as these were absent from the bundles.
The quilt is made up from 2 BLOCKS of LOG CABIN patterns and these repeat alternatively throughout the quilt. Little tip - I made sure that when I was cutting the fabrics I always referenced the Block pictures so I knew if it was a horizontal or vertical piece I was cutting in order to make sure the fabric patterns were always going to look their best on the quilt.
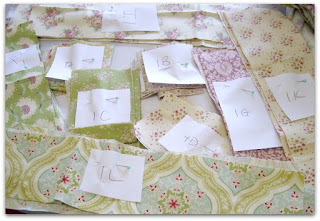
I dont have a rotary cutter which I know is a cardinal sin for any 'serious quilter' so I made sure I was cutting evenly by laying the template on to the fabric in the right direction and then allowing a 1cm seam when making the final cut. Each time I cut a piece of fabric I have ticked it off my sheet so that I know this one is done and then labelled & pinned those together so for example: 1A is a reference to BLOCK 1 and piece A, and so on ... (see pic below)
This cutting out stage is quite lengthy as you will need eight lots of each piece and there are 13 of them on each BLOCK. Actually how many is that!??! ... infact it's 104 pieces altogether for each block so you will have 208 pieces once all the LOG CABIN Blocks are complete (note at this stage I haven't cut out the off white fabric or the corners for joining all the Log Cabins together this will come later in the project as I have decided to sew all the log cabins together first)
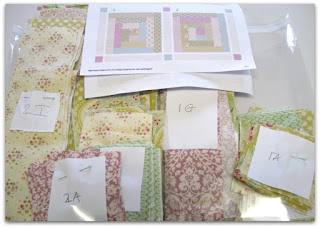
As with any project that's worth doing well preparation is the key to success as the old saying goes 'Fail to prepapre & prepare to Fail!' so you can see why I have taken my time at this initial stage of the cutting process, making sure all the fabrics are horizontal or vertical depending where they appear on the Log Cabin design, and labelling each set of pieces and placing in to two bags - one for Block 1 and another for Block 2. (see pic below) I am sure this is going to make the next stage so much easier as 'ALL' I need to do now is sew the Blocks together piece by piece until I have 8 Blocks of each Log Cabin design so 16 in total!!!
This little lot should keep me busy for a while - next stage 2 - sewing my first 2 Blocks one of each!! I'll be posting back here once those are done with some more updates of how I'm getting on!
Wish me luck!
Sarah X


soft colour n looks clean. i like the composition
ReplyDeleteThanks Heru - I've done quite a bit of patchworking but never had the courage to take on a quilt but saw this one on the back of the Spring Tilda catalogue and knew I had to give it a go! X
Delete